With OIM 11G, the way we create scheduled tasks has changed drastically.
Now a scheduler task is a plugin, which has to first imported into OIM before it can created as a Scheduled Job in OIM console.
Though the steps are defined in the OIM Developers Guide, it could be difficult to get it done given the different tasks involved are given in separate sections. So here lets look at the steps involved in creating a scheduled task in OIM 11G.
1) Creating the Scheduler Metadata xml
While creating a scheduled task, we have to create a metadata xml file about the task, which holds the information about the scheduled task, like task name, class name, parameter, etc.
For more info about the XML structure, check the documentation here.
Make sure the file name is the same as the SchedulerName.
Create a folder of storing this xml, say SchedulerMetaData. in that folder create another folder "db". Place the xml file inside this folder.
Now we can import the xml file into the OIM MetaDataStore.
First export thr OIM_ORACLE_HOME
Make some changes to the weblogic.properties file.
Now run the weblogicImportMetadata.sh
While running provide the weblogic details.
Metadata should get imported successfully.
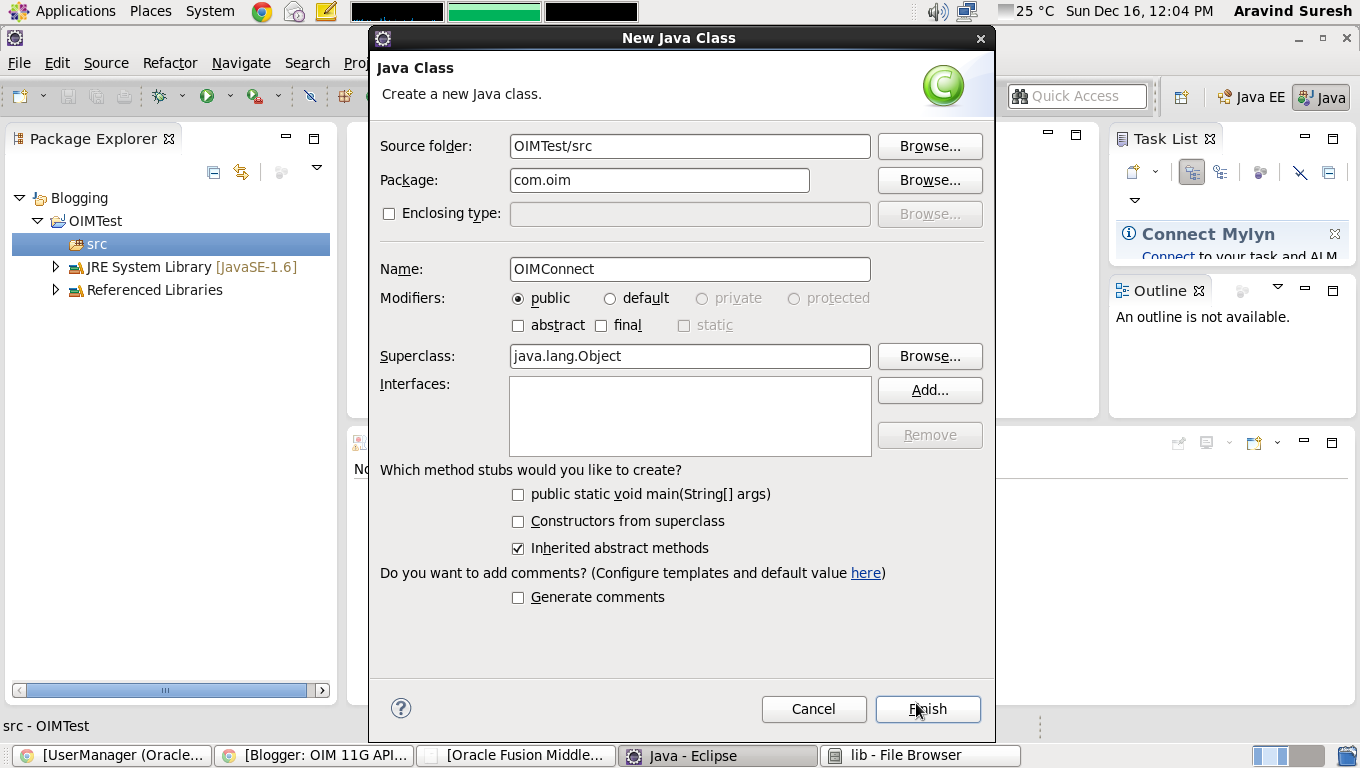
2) Creating the Java file
Now we can write the Scheduler Code. In OIM 11G, the scheduler task java code is slightly different. Here we extend the "oracle.iam.scheduler.vo.TaskSupport" class instead of the SchedulerBaseTask class.
After writing the code, create a jar file of the class, either from eclipse or using the jar command.
We have to now create this into a plugin
Create a new folder for the plugin, say SampleScheduler. Create a folder named lib in it and place the jar file in it.
3) Create the Plugin xml file
Now we have to create a plugin.xml file, specifying the plugin class and pluginpoint.
Create a file named plugin.xml, in the SampleScheduler folder which we created earlier.
Add the following contents in the file.
./SampleScheduler/
plugin.xml
lib/
SampleScheduler.jar
Create a zip of this folder.
4) Registering the plugin
Now that we have the plugin zip file, we have to register it in OIM.
Change directory to $OIM_SERVER_HOME/server/plugin_utility
In the ant.properties, set the WLS_HOME and the OIM_HOME variable values.
Make sure the wlfullclient.jar is created in the weblogic server lib. Instructions for this can be found in my previous blog.
To register the plugin use the following command.
5) Creating Scheduled Job in OIM console
Login to OIM console.
Goto Advanced>System Management>Scheduler.
Click on the new Scheduled Job icon in the left panel.

In the "Task" field search for the new scheduled task we imported.

Fill the other details and Apply.


The Scheduled Job is created!!!
Now a scheduler task is a plugin, which has to first imported into OIM before it can created as a Scheduled Job in OIM console.
Though the steps are defined in the OIM Developers Guide, it could be difficult to get it done given the different tasks involved are given in separate sections. So here lets look at the steps involved in creating a scheduled task in OIM 11G.
1) Creating the Scheduler Metadata xml
While creating a scheduled task, we have to create a metadata xml file about the task, which holds the information about the scheduled task, like task name, class name, parameter, etc.
<scheduledTasks xmlns="http://xmlns.oracle.com/oim/scheduler"><task><name>SampleScheduler</name><class>com.oim.SampleScheduler</class><description>List User Logins</description><retry>5</retry></task></scheduledTasks>
For more info about the XML structure, check the documentation here.
Make sure the file name is the same as the SchedulerName.
Create a folder of storing this xml, say SchedulerMetaData. in that folder create another folder "db". Place the xml file inside this folder.
Now we can import the xml file into the OIM MetaDataStore.
First export thr OIM_ORACLE_HOME
export OIM_ORACLE_HOME=/oracle/Middleware/Oracle_IDM1Now change directory to $OIM_ORACLE_HOME/server/bin
Make some changes to the weblogic.properties file.
# Weblogic Server Name on which OIM application is runningwls_servername=oim_server1# If you are importing or exporting any out of box event handlers, value is oim.# For rest of the out of box metadata, value is OIMMetadata.# If you are importing or exporting any custom data, always use application name as OIMMetadata.application_name=OIMMetadata# Directory location from which XML file should be imported.# Lets say I want to import User.xml and it is in the location /scratc/asmaram/temp/oim/file/User.xml,# I should give from location value as /scratc/asmaram/temp/oim. Make sure no other files exist# in this folder or in its sub folders. Import utility tries to recursively import all the files under the# from location folder. This property is only used by weblogicImportMetadata.shmetadata_from_loc=/oracle/SchedulerMetaData# Directory location to which XML file should be exported tometadata_to_loc=@metadata_to_loc# For example /file/User.xml to export user entity definition. You can specify multiple xml files as comma separated values.# This property is only used by weblogicExportMetadata.sh and weblogicDeleteMetadata.sh scriptsmetadata_files=@metadata_files
Now run the weblogicImportMetadata.sh
While running provide the weblogic details.
Starting import metadata script ....Please enter your username :weblogicPlease enter your password :Please enter your server URL [t3://localhost:7001] :Connecting to t3://localhost:7001 with userid weblogic ...Successfully connected to Admin Server 'AdminServer' that belongs to domain 'oim_domain'.
Metadata should get imported successfully.
2) Creating the Java file
Now we can write the Scheduler Code. In OIM 11G, the scheduler task java code is slightly different. Here we extend the "oracle.iam.scheduler.vo.TaskSupport" class instead of the SchedulerBaseTask class.
package com.oim;import java.util.HashMap;import java.util.HashSet;import java.util.List;import java.util.Set;import oracle.iam.identity.usermgmt.api.UserManager;import oracle.iam.identity.usermgmt.vo.User;import oracle.iam.platform.Platform;import oracle.iam.platform.entitymgr.vo.SearchCriteria;import oracle.iam.platform.entitymgr.vo.SearchCriteria.Operator;import oracle.iam.scheduler.vo.TaskSupport;public class SampleScheduler extends TaskSupport {@Overridepublic void execute(HashMap arg0) throws Exception {UserManager usrMgr = Platform.getService(UserManager.class);SearchCriteria sc = new SearchCriteria("User Login", "*", Operator.EQUAL);Set<String> retAttrs = new HashSet<String>();retAttrs.add("User Login");List<User> users = usrMgr.search(sc, retAttrs, null);for(User user : users){System.out.println(user.getLogin());}}@Overridepublic HashMap getAttributes() {// TODO Auto-generated method stubreturn null;}@Overridepublic void setAttributes() {// TODO Auto-generated method stub}}
After writing the code, create a jar file of the class, either from eclipse or using the jar command.
We have to now create this into a plugin
Create a new folder for the plugin, say SampleScheduler. Create a folder named lib in it and place the jar file in it.
3) Create the Plugin xml file
Now we have to create a plugin.xml file, specifying the plugin class and pluginpoint.
Create a file named plugin.xml, in the SampleScheduler folder which we created earlier.
Add the following contents in the file.
Now the folder should have the following structure.<?xml version="1.0" encoding="UTF-8"?><oimplugins xmlns:xsi="http://www.w3.org/2001/XMLSchema-instance"><plugins pluginpoint="oracle.iam.scheduler.vo.TaskSupport"><plugin pluginclass= "com.oim.SampleScheduler"version="1.0.1" name="SampleScheduler"></plugin></plugins></oimplugins>
./SampleScheduler/
plugin.xml
lib/
SampleScheduler.jar
Create a zip of this folder.
4) Registering the plugin
Now that we have the plugin zip file, we have to register it in OIM.
Change directory to $OIM_SERVER_HOME/server/plugin_utility
In the ant.properties, set the WLS_HOME and the OIM_HOME variable values.
Make sure the wlfullclient.jar is created in the weblogic server lib. Instructions for this can be found in my previous blog.
To register the plugin use the following command.
ant -f pluginregistration.xml register
Make sure ant is added into the PATH already.
Provide the OIM server details when asked.
[input] Enter the oim user id:xelsysadm[input]Enter the oim user password:[input] Enter the server url [t3://<host>:<port>] :t3://localhost:14000[input] Enter name (complete file name with path) of the plugin file:/oracle/SampleScheduler.zip[echo][echo] Plugin RegisteredBUILD SUCCESSFUL
5) Creating Scheduled Job in OIM console
Login to OIM console.
Goto Advanced>System Management>Scheduler.
Click on the new Scheduled Job icon in the left panel.

In the "Task" field search for the new scheduled task we imported.

Fill the other details and Apply.


The Scheduled Job is created!!!